TUTORIAL TIME!!
Today I'm sharing a tutorial on how to do a fully covered shaker card paired with an image from the latest digi collection "Spellbinding Witches."
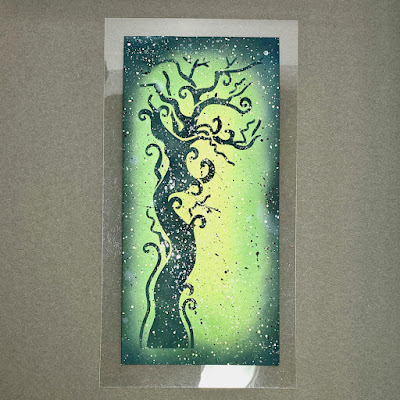
I started by creating my background using Tim Holtz twisted citron, mowed lawn and black soot distress oxide ink. Then I did a bunch of splatters with white and black thinned out gesso and liquid glitter. I added another layer used PD's "Creepy Tree" stencil but instead of the oxide I used the regular TH black soot for a darker black and also distressed the edges slightly with it.
To start your fully covered shaker, cut your acetate 1/2" wider on each side of your whole layer.
Next I scored my acetate at that 1/2" mark but when you do this don't score EXACTLY at 1/2". Try to make it just a hair bigger on all sides to compensate for the thickness of your paper and sequins you might add.
I found my card front was just a smidge too tight once I put it inside with the flaps closed so I shaved part of my card front off to accommodate. This part can be a little finicky but it works out in the end.
Now cut your corners off indicated in the photo above so you have very nice flat flaps to adhere. Add your favourite adhesive to your acetate so that when you fold the flaps closed it's attached to your card front layer as a whole piece, not the base of your card.
The next step for your fully covered acetate shaker is to position your images where you would like them to be because ... see next photo:
...you will want to add some foam tape to pop up your acetate to give your sequins more room to float around in so this is what it looks like behind the scenes. You can see that once I place my images back the foam tape will be covered.
Now you would cover your card front with the prepped acetate folding your flaps around to the back and adhering 3 out of 4 flaps. Next, remove your foam backing and stick your acetate to the foam and then add your sequins from the last flap you've left open then adhere the 4th flap. VOILA! You now have your card front and as shown here I have already popped it onto a white layer and then the black card itself.
Add your images using your favourite adhesive or more foam and you're done! There are so many different ways of creating this. You could actually have your scene inside the whole acetate cover if you choose but I still suggest popping your images up so you have room for your contents to float around. I have seen some without using foam and if you choose this, just remember to score a bit bigger than your card front.
If you have any questions please leave a comment and I'll do my best to get back to you. I hope you enjoyed this tutorial and give it a try!
Have a great day!


