Showing posts with label Birthdays. Show all posts

Friday, September 10, 2021

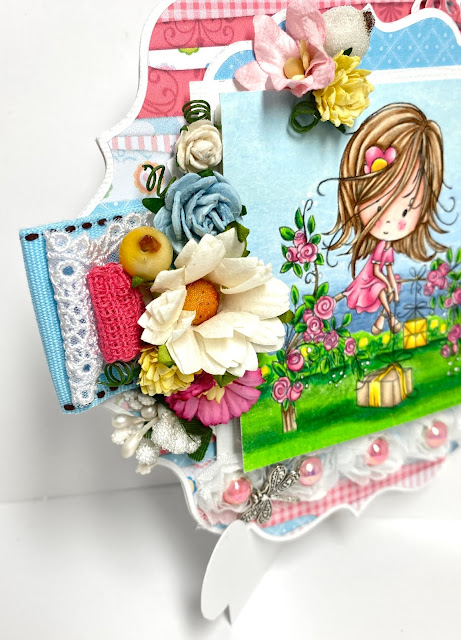
Krista Smith Stamps "Birthday Girl"

Do you remember Saturated Canary?  The artist was Krista Smith and although that company doesn't exist anymore, as an artist, she is still creating and selling and I've always loved colouring up her images.  I found time to colour again!  YAY ME!  🤣🤣🤣

It's very rare that I colour something twice, not because I don't like it but because I don't normally have time.  Being a part of design teams for so long has me pushing along with all their new images, which I love!!  However, these were commissioned cards and this is what she chose!  

This image is called "Birthday Girl" and you can find her here on Krista Smith Stamps Etsy Shop.  

I've coloured her up using my copics and in this case the customer asked for a blonde with blue eyes and her favourite colour is lime green.  This was a challenge but I like how it turned out.  😀. Both are shaker cards as well.  Just some fun interaction for the recipient.  

And this one was for a recipient with brown hair, blue eyes and favourite colour being purple and turquoise.  I love this combo!
And this is the first time I have ever duplicated a card as close as this but the customer was short on time.  Thankfully the girls live in different cities so they'll never see each other's cards.  LOL!  And the customer was happy!!  That's what counts!  😀💕

Thanks for stopping by I hope you liked my creations for today!!
Hugs,
Eulanda

Sunday, May 16, 2021

Fathers Day Inspiration

Looking for a father's day card?  Well maybe this can be a little inspiration for you!!  I've used paper from the "Happy Hour Kit" collection by Reminisce for my base layer as well as one of the layered stitched tags.  

Normally I don't use glitter for a masculine card but I die cut the glass from some "Best Creation" black glitter cardstock and filled Tonic's "Cheers Die and Shaker" shaker using some Heidi Swapp Marquee Love glitter (stash - YAY) and some Studio Katia glitter. 

I added some Tim Holtz metal stars and twine pieces from my stash to finish this off.


Hope you've enjoyed my masculine project today!

Enjoy your weekend all!

Hugs,
Eulanda

Sunday, May 9, 2021

Gnome-tastic Celebration Balloons

Today I've got a bright fun birthday card to share with you!  🎈🎂🎁

This image is soooooo adorable with those balloons!!!  It's from the Gnome-tastic digi collection called "Celebration Balloons", which is available in a black and white digi, pre-coloured deep and light skin.  It also comes with the svf and dxf files.  I added some white hearts with my Molotow paint marker to his hat to match those balloons.


I die cut some balloons using papers from the Hearts & Happiness 6" x 6" paper pack, which I also used for the base and 2nd layer of my card.  I managed to sneak in a few pieces from the Sweet Tweet paper pad so I had lots of balloons to layer up.  Even cut some from white cardstock and ran them through an embossing folder to give the illusion that my balloons are designed with circles or dots on them.


I printed out one of the 25 sayings from the Gnome-tastic Sentiments printable download digi set.  I love this because I hate trying to think of some kind of sentiment for my cards.  I'm horrible with words so I'm really not a fan of doing the inside of the cards either.  Having a selection makes it easier to just pick and print.  VOILA!!  I got ahead and added a bunch to a sheet of paper and even duplicated a few but changed the sizing in case I wanted it smaller or larger for other cards.  😀


Do you have a lot of birthdays in April?  This image is perfect for them but I could also see using it for an other occasion where we give gifts like an anniversary or congratulations card.  Very versatile for sure!  🥰

Thanks for stopping by!

_____________________________________________________________

Copics:

BG00, 53, 57, 78
YG01, 05, 07, 17, G28
RV00, 63, 55, 66
W0, 1, 3, 5

Sunday, May 2, 2021

Polkadoodles Gnome-tastic Collection

Hello and welcome back!!  Today's card features a cute sentiment in a shaker tag!


Normally I choose my papers first and then colour my image but this time I didn't and WOW is that a whole ton harder!!  LOL!  Never again!  🤣🤣  I did print out a sheet from Octavia Moonfly - Paper Heaven 4 on the Ultimate Graphic paper and used that for my base layer.  Then I cut a tag or wide arrow shape using a sheet from the Timeless Rose 6" x 6" craft paper pad.

I combined 2 images from the new Gnometastic collection and the first is  Gnometastic "Birthday Cake" digi available in black and whitelight skin precoloured and deep skin precoloured and all include the svg/dxf file.  The 2nd image is Gnometastic "Birthday Gift" digi available in black black and whitelight skin precoloured and deep skin precoloured all include the svg/dxf file.  I coloured this image using my copics and listed them below.  I did add some sort of hash marks or burlap look to her hat using my prisma pencil crayon for some added texture and some cute copic flower shapes to her top.  Ohhhh and I did get the idea of his apron from the pre-coloured image.  So cute with the stripes!

The slimline shape made it easy to add a sentiment right beside the image allowing me to use a sentiment to the shaker element from the new Gnome-tastic Sentiments printable downloads.  I like not having to think of a sentiment so this set is just handy and I also like that because it's a download, you can size it anyway you want it!!  

After adding some ribbon, glittery pop up pearls and flowers embellishment this card was done!!

Have you ever heard the song "If I Knew You Were comin'"?  This card reminded me of that song.  I'm pretty sure I heard it on Sesame Street (a child's show from when I was a kid) but it turns out it was an actual song released in 1950!  

If I knew you were comin' I'd've baked a cake, baked a cake, baked a cake
If I knew you were comin' I'd've baked a cake
Howdya do, howdya do, howdya do?

There's more but I thought this was enough to have it stuck in our head so ... you're welcome!  🤣🤣🤣

Have a great day!
_____________________________________________________________

Copics:

W1, 3, 5, 7, 9, 100
C00, 1, 3, 5, 7, 9, 10
E33, 35, 57, 79
RV13, 25, 29, 69
E000, 00, 04, 11, 21, R20, 21
Y11, 15, 17, 38, YR23, 24

Sunday, April 11, 2021

Polkadoodles Horace & Boo - Surprise

Today I'm sharing this adorable outdoor birthday scene starring Horace & Boo!


This Horace & Boo - Surprise polymer stamp is also available in digi form.  As you can tell by the image, I've added a whole outdoors landscape using my Prismacolor pencil crayons.  I think I'm living vicariously through my scenes.  🤣🤣

I popped up the image on the Squarey Swirly Hearts die and used papers from the the Hearts & Happiness 6" x 6" paper pack.  This pack contains such pretty subtle peaches and blues and just perfect for those spring and summer projects.


I created the the saying using the Super Sentiments collection that comes with 49 clear polymer stamps.  So easy to make up any saying for every day and occasion cards!  I added a few wooden stars that I painted with some gesso to create more of a shabby look.


Thought I would add a layer of lace topped by some peach rhinestone lace to just finish off the card.


Are you starting to creating those spring/summer/easter cards now too?

Thanks for stopping by today!
Eulanda

Friday, March 26, 2021

Polkadoodles Hyacinth

Hello and welcome back!!  Today I'm sharing a quick tip on how to shabby up those card edges!!  😀


I went with super bold colours on this card, more for a challenge because I wanted to see how the colours would turn out once completed.  Well, it's BOLD I'll say that.  LOL!  I printed out some papers from the Winnie Celebrations Kit 3 digi papers on PD's Ultimate Graphic 160gsm paper pack.

Not sure if you can see it but I snuck in the Delicate Daisy Corner craft cutting die into the left corner of the card and added flowers...albeit over top but you can still see it sticking out.  

I've used my copics to colour up this beauty digi called Hyacinth Darling Bud, which is also available in a clear polymer stamp.  


Aren't these Love Hearts just adorable?!!  I stamped them out onto copic paper, cut them using my Brother scan and cut then coloured them with the same combo that I used on the image.    


So my tip to create fast shabby edges is simply to use a Zutter!!  Check it out right here!  Just don't shove your paper into it because I know it's meant for heavier papers including chipboard and I've made that mistake myself.  🤣🤣🤣 

Thanks for stopping by!!  🥰

DISTRESSING EDGES VIDEO


__________________________________________________________

Copics:

B01, 02, 04, 05, 06
BV01, 34, 17, 08
W3, 5, 7, 9
RV13, 25, 29, 69
E000, 00, 04, 11, 21

Sunday, March 7, 2021

Stamping Bella - Curvy Girl Baker

I have to say I think this is one of my personal favourites lately. 🥰  I’ve created a shaker card and added some super cute clay lady bugs with some sequins and micro silver balls for the contents.  The image is Curvy Girl Baker from Stamping Bella and I think the sentiment is just so perfect.  I can eat cake anytime…even for breakfast.  LOL!  What about you?  


The papers are Frozen Roses from Ciao Bella and such pretty papers they are!  


I decided to dress up my card photo's with just a couple of extra's from my scrapbook program.  I used an online program to take away my original background and then added the background paper, sequins and ric rac ribbon embellishments.  I just wanted to try and up the ante so to say but I hope you like it!!  Figured it would be easier than actually finding all those pieces to match each card.  LOL!  

Thanks for stopping by!

Have a great week!
Hugs,
Eulanda

Saturday, January 9, 2021

Stamping Bella "Beatrice & Barbara are Besties"

When it comes to cards for my sister I really go to town.  The only problem that comes up the following year is ... "ok crap, how am I gonna top this?"  LOL!  I'm sure we've all gone through that.  Yet, every year so far I've manage to do it but I will say it is getting harder!

The stamp I used is from Stamping Bella called "Uptown Girls Beatrice and Barbara are Besties" and I used my Prismacolour pencil crayons to colour and create the rest of the scene.  This is what the image originally looked like.  

Don't they look like they're just enjoying each other but also seriously up to something?!  Such a great depiction of us!!  🤣🤣


I had this gorgeous heart in my stash so I added some berries and Wild Orchid flowers.


I've used some Laswerowe Love chipboard hearts, painted them with Tim Holtz distress paint and then covered them icicle Stickles.  


Hope you've enjoyed this card as much as I enjoyed creating it.

Thanks for stopping by!
Hugs, 
Eulanda

Friday, December 11, 2020

Winnie Sunshine Delight Coffee

Today I'm sharing a birthday card using the sweet Winnie image called "Sunshine Delight Coffee" because yes, even during winter and Christmas people still have birthdays.  🎂😂


You can buy this image in a black and white or pre-coloured file.  She is cute either way don't ya think?  For my sentiment I used one of the many from the Perfect Wishes clear stamp set.  I love the imprint it leaves, it's so ... well ... perfect!!  😀


I printed out a few pieces of design paper from the Eden Collection - Paper Heaven 1 Craft bundle.  I really enjoy printing off my own papers sometimes and using the Ultimate Graphic paper is perfect for such an occasion.  You don't even have to make any edits, just print! 

I've added some wooden butterflies I have in my stash along with some Wild Orchid flowers. 


As usual I've done lots of layering but this time I've used the Posydoodles Basic Rectangle dies to help me out.  Oh and did I mention they are on sale?!!  I don't know if you can see it or not but on the very top layer (the piece the sentiment is on) the rectangle die cut some teeny tiny dots.  It's a very subtle look but I love it!  You can probably see it better in the 2nd pic above.


Have you ever used digital papers before?  Where I live, I almost have to.  We don't have a store very close and sometimes it's just super convenient.

Hugs and thanks for stopping by!
Eulanda
_____________________________________________________

Copics:

BG000, 01. 02, 05, 07, 09
E21, 25, 27
E30, 31, 33, 35
E000, 00, 04, 11, 21, R20

Sunday, October 25, 2020

A Beary Mice Surprise

Just a card I had shared on FB but I didn't add it onto my blog.  As the title of the post says, this image is "A Beary Mice Surprise" from Di's Digital Stamps.  She also has a pre-coloured image if you're in a hurry or you're not into colouring so much.  LOL! 

I made a super cute confetti shaker card.  I cut the YUM sentiment 4 times in white and then once in teal.  I realized it needed a bit more zip so I added some stickles to the top.


I coloured this image using my copics and also learned some of my techniques form Kit & Clowder.  She has some really amazing classes.  In fact, I would say they are the best but she has some Create & Learn monthly classes where you can learn lots as well for a mere $20!!  Great pricing!! 

Enjoy your Sunday!  I'm off to colour!  YAY! 
Hugs,
Eulanda
_____________________________________________________

Copics:

RV13, 25, 29, 69
V12, 15, 17, 09
RV00, 11, 32, 34
E30, 31, 33, 34, 35, 37
W0, 1, 3, 5
C00, 0, 1, 3


Sunday, October 11, 2020

Out of This World

HA HA HA OMG HOW CUTE IS THIS?!  I just love this crazy little guy!!  It's from Kraftin' Kimmie's clear stamp set called "Out of This World".   I paired this little fellow up with some papers from Polkadoodles called "Little Monsters" printable digi paper.  I made this card for a very special boy who turned 1 and is just the cutest boy EVER!  Ok, maybe a bit biased as he's my step-grandson but freakin' adorable!  .Had to add the googley eyes tho so he could shake the card even tho he might not understand the card.  Hee Hee

Sooooooo as a result of me having to buy some googley eyes, my sister was here and ended up doing THIS to my husband's truck.  OMG we laughed so freakin' hard and we had to be careful because he was home while we were doing it.  He did think it was pretty funny tho.  Good sport however, they didn't stay on for long.  He took the off before he left for work - damn him!  ha ha ha!!!


Happy thanksgiving to all my Canadian peeps!!
  
Have a great Sunday!!  
Hugs, 
Eulanda

Y38 YR04, 07, 09, E19
W3, 5, 7, 9
V12, 15, 17, 09, B37, 39, C9, 10, 100


Friday, August 14, 2020

Winnie Gifts Galore

Welcome to today's post where I am sharing a video on how to use scrap ribbon!!  I always have little pieces that are super pretty but useless, however, I'm a crafter so I hoard...I mean collect!!!  😂😂


I've used papers from the summery Winnie Sunshine Delights 6" x 6" digital paper pack and printed with Ultimate Graphic 160gsm paper.   If you haven't tried this paper yet OH MY!!  Don't wait another moment!!!  There is no need for any editing as it prints color beautifully.  

I love having butterflies of any shape and size on my card so the Butterfly Trio - 3 craft cutting dies are perfect as there are 3 available options in the package.  There are sooooo many different ways of using them.  I like to layer mine so I've layered this with some white (which you can see better in the top pic) and then topped off with a heart gem from my stash.  I also snuck in a seam binding bow to finish if off.


I love this gorgeous Winnie "Gifts Galore" clear polymer stamp and it stamped just beautifully, like all of them always do.  I coloured using my Prismacolor pencil crayons and have listed the combo's below. Here is a closer look at the layered ribbon embellishment stack.  Sometimes we overthink pieces on our card (well I know I do) and it can come down to something so simple yet perfect!  😀


I added 3 LED lights to this card and added the "on" switch at the base of the tree.  If you follow me, you know how much I luuuuv my lights!! 💕   They aren't hard to add and don't take a lot of time.  I do have a video on my YouTube channel to show how to add these but I will be adding more.


I hope you've enjoyed this little cutie card.  Do you think you might give the ribbon stack a try?  It felt really simple to share this technique but sometimes when I see something easy I do the 🤦🏼‍♀️ (palm to forehead) thing and in my mine I'm thinking "wow so easy, why didn't I think of that?"

As mentioned above here you go!


Hope you and your family are all well and staying safe!
Sending out warm hugs to you all!
Eulanda

Prismacolors

Sky Blue Light, Powder Blue, Periwinkle
Spring green, Apple green, Grass Green, Dark Green
Deco Yellow, Canary Yellow, Sunburst Yellow
Deco Pink, Pink, Magenta
White, Light Peach, Peach, Burnt Ochre, Chocolate

Monday, May 25, 2020

Moooove It Mini Shaker

I made these cards quite some time ago but found this post in my drafts.  How could I not share this?!!  😮   They're great idea's for father's day and birthday cards.  I used my Silhouette to cut this card shape.  It took a bit of fiddling but worked out great after all!  😁


And colored the cows with my copics.


Copics:
R22, 29, 46, 59
E41, 42, 43, 44, 47
E30, 31, 34, 35, 37
E51, 53, 55, 57
Y11, 13, 15, 17
E00, 01, 02, 95
G21, 94, 99


ha ha ha ha!!  Just plain fun!!


Hugs to all!!
Eulanda


Copics:
R00, 20, 21
E41, 42, 43, 44, 47
E30, 31, 34, 35, 37
E50, 51, 53, 55
E11, 13, 15, 17
Y00, 11, 15, YR23, 24


Friday, May 15, 2020

Using LED's for a Card

Today I'm sharing a video on how to enhance a card using LED light's!


This "Surprise!" image is available as a clear stamp (named "Boo"), black and white digi and even a pre-colored version!  I've colored it using my Prismacolor pencil crayons and added some fun patterns to the balloons and his party hat for some texture.

I've used the gorgeous and stunning Adalene French Vintage Shabby Chic 6 x 6 paper's.  They are soooooo pretttttttty....and I've added my usual array of flowers and embellishments including some burlap butterflies.


And here it is all lit up!!!  


Here is my video to see how I've done this.
Thanks for stopping by and I hope you're all staying safe!!  
Hugs💕
Eulanda 


Friday, April 10, 2020

Winnie - Sky's the Limit

Today I've decided to share a slimline card with you, which I am LOVING but you really have to think about how to fill space vertically!  😮


Here I've cut my base then rolled the scalloped slimline die through my die cut machine.  Next I cut my cloud patterned paper is from Work & Play 1-10 Paper Heaven.


Here are all my layers adhered together and I used foam pop up dots to build height on my card.  I love dimension!!


I picked papers from the Mermazing Ocean 6 x 6 paper pad to use for my grass and sun elements.  Also for layering my sentiment from Sentimentals 6" x 6" paper pack.  It comes with sooooo many sentiments it makes picked out the perfect saying super easy!  The Posydoodle Tags are a perfect addition for the sentiments as it comes with 5 different tags for you to choose from.  

I also cut some tree's for my forest from the Iced Branches die set and added the leafs from thew new Super Sprigs die.  Oh I think you're going to see a lot of that on my cards going forward.  What a handy die!


I've colored Winnie using my copics and this image is called Sky's the Limit, which you might be able to find at your local stockists as it does come as a clear polymer stamp.  If you can't find it there, it's in in the store in black and white and precolored, which some days is super handy if you need a quick card.


I hope you've enjoyed my card for today!!  I certainly enjoyed making it!

Have a crafty day!
Hugs,
Eulanda

E42, 43, 47, 49
E000, 00, 04, 11, 21, R20
E11, 08, 17, 15, 18
RV00, R81, 83, 85, 56
BV20, 23, 25, 29